PyTestAllure

Pytest_L1
Pytest 安装
1 | pip install pytest |
Pytest 命名规则
| 类型 | 规则 |
|---|---|
| 文件 | test_开头或者_test结尾 |
| 类 | Test开头 |
| 方法/函数 | test_开头 |
- 注意:测试类中不可以添加 init 构造函数,添加之后,无法识别相关测试用例
PyTest 测试用例结构
- 用例名称
- 用力步骤
- 用例断言
- 测试用例示例
1 | def test_XXX(self): |
- 类级别的测试用例
1 | class TestXXX: |
PyTest测试用例断言
- 什么是断言
断言(assert)是一种在程序中的一阶逻辑,目的为了表示与验证软件开发者预期的结果。当程序运行到断言的位置时,对应的断言应该为真。若断言不为真,程序会终止执行,并给出错误信息
-
断言写法
- assert <表达式>
- assert True
- assert False
- assert <表达式>,<描述>
- assert False,‘Test false’
- assert <表达式>
1 | import sys |
Pytest 测试框架结构
| 类型 | 规则 |
|---|---|
| setup_moudle/teardown_module | 全局模块级(.py文件) |
| setup_class/teardown_class | 类级(class),只在类中前后运行一次 |
| setup_function/teardown_function | 函数级,在类外 |
| setup_method/teardown_method | 方法级,类中每个方法执行前后 |
| setup/teardown | 在类中,运行在调用方法的前后(重点,相当于setup_method/teardown_method缩写) |
1 | # coding=utf-8 |
1 | # result |
计算器实战
计算器通过加法、减法、乘法、除法等功能的运算
Pytest_L2
Pytest参数化用例
参数化应用场景
-
测试登录场景
- 登录成功
- 登录数百
-
普通测试用例方法
- copy多份代码 or 输入多个参数
Pytest参数化实现方法
- 装饰器:
@pytest.mark.parametrize(“参数名(与测试用例中需要替换的参数一致)”,[参数值1,参数值2])
1 |
|
Mark:参数化测试函数使用
单参数,可以将数据放在列表中
1 | import pytest |
多参数,将数据放在列表嵌套元组中或列表嵌套列表中
1 |
|
用例重命名
用例重命名-添加ids参数
- 通过ids参数,将别名放在列表中,ids列表中参数的数量要与第二项参数值的个数一致
1 |
|
用例重命名-添加ids参数(中文情况)
- 在项目下新建conftest.py文件,添加以下内容
1 | def pytest_collection_modifyitems(items): |
- 通过ids参数,将别名放在列表中,ids列表中参数的数量要与第二项参数值的个数一致
1 | # ids设置中文的情况 |
笛卡儿积
-
两组数据
- a=[1,2,3]
- b=[a,b,c]
-
对应有几种形式
- (1,a)(1,b)(1,c)
- (2,a)(2,b)(2,c)
- (3,a)(3,b)(3,c)
-
装饰器其实就是一个方法,先执行离测试用例最近的装饰器,在执行远的,由近及远,所以测试结果是1-a,1-b,1-c,2-a,2-b,
1 | # 笛卡儿积 |
标记测试用例
- 场景:只执行符合要求的某一部分用例,可以把一个web项目划分多个模块,然后指定模块名称运行
- 解决:在测试用例方法上加 @pytest.mark.标签名
- 执行:-m执行自定义标记的相关用例
- pytest -s test_mark_zi_09.py -m=webtest
- pytest -s test_mark_zi_09.py -m “apptest”
- pytest -s test_mark_zi_09.py -m “not ios”
- 在文件夹下新建pytest.ini文件,注册标签,避免执行pytest -m 命令时出现warinning
1 | [pytest] |
- 新建测试用例
1 | import pytest |
设置跳过、预期失败用例
- 调试时不像运行这个用例
- 标记无法在某些平台上运行的测试功能
设置跳过
-
添加装饰器
- @pytest.mark.skip
1
2
3
4
5
6
7
8
9
def test_true():
print('true')
assert True
# RESULT
SKIPPED (未开发完成) [ 50%]
Skipped: 未开发完成- @pytest.mark.skipif
1
2
3
4
5
6
7
def test_true1():
print('Platform:{}'.format(sys.platform))
assert True
# RESULT
PASSED [ 66%]Platform:win32 -
代码中添加跳过代码
1
2
3
4
5
6
7
8
9
10
11
12
13
14pytest.skip(reason)
def check_login():
return True
def test_login():
print('start')
if not check_login():
pytest.skip('unsupported configuration')
print('end')
# RESULT
PASSED [100%]start
end
预期失败用例
- xfail使用场景
- 与skip类似,预期结果为fail,标记用例为fail
- 用法:添加装饰器@pytest.mark.xfail
1 |
|
1 |
|
1 | def test_result2(): |
运行用例
-
运行 某个/多个 用例包(文件夹)
在某个文件夹下直接运行pytest,将会测试所有符合 test_xxx或 xxx_test 命名的用例
1 | root@99eb4bd37fb2:~/code/vscode-server/PyTest/L2# pytest |
-
运行 某个/多个 用力模块
pytest 文件名.py
1 | root@99eb4bd37fb2:~/code/vscode-server/PyTest/L2# pytest test_param.py -v |
-
运行 某个/多个 用例类
pytest 文件名.py::测试类名
1 | root@99eb4bd37fb2:~/code/vscode-server/PyTest/L1# pytest test_setup_teardown.py::TestDemo -v |
-
运行 某个/多个 用例方法
pytest 文件名.py::测试类名::测试用例名
1 | root@99eb4bd37fb2:~/code/vscode-server/PyTest/L1# pytest test_setup_teardown.py::TestDemo::test_demo1 -v |
测试用例调度与执行
-
命令行参数-使用缓存状态
- –lf(–last-failed)只重新运行故障
- –ff(–failed-first)先运行故障然后再运行其余的测试
1 | # 正常测试 |
pytest 命令行常用参数
- –help 获取参数列表
1 | root@99eb4bd37fb2:~/code/vscode-server/PyTest/L2# pytest --help |
- -x 用例一旦失败(fail/error)立刻停止执行
1 | root@99eb4bd37fb2:~/code/vscode-server/PyTest/L2# pytest -x |
- –maxfail=num 用例达到
1 | root@99eb4bd37fb2:~/code/vscode-server/PyTest/L2# pytest --maxfail=3 |
- -m 标记用例,执行@pytest.mark.xx 标记为xx的用例
1 | root@99eb4bd37fb2:~/code/vscode-server/PyTest/L2# pytest -m 'bignum' -vs |
- -k 执行包含某个关键字的测试用例(针对测试用例名称)
1 | root@99eb4bd37fb2:~/code/vscode-server/PyTest/L2# pytest -vs -k 'login1' |
- -v打印详细日志
1 | root@99eb4bd37fb2:~/code/vscode-server/PyTest/L2# pytest -v -k 'login1' |
- -s打印输出日志(一般-vs一起使用)
1 | root@99eb4bd37fb2:~/code/vscode-server/PyTest/L2# pytest -s -k 'login1' |
- –collect-only(测试平台,pytest自动导入)
1 | root@99eb4bd37fb2:~/code/vscode-server/PyTest/L2# pytest --collect-only -k 'login1' |
执行Pytest
- 代码执行main函数
1 | if __name__ == '__main__': |
- 使用python -m pytest调用pytest
1 | PS E:\PycharmProjects\PyTest\L2> python -m pytest -vs .\test_param.py^ |
pytest异常处理
- try…except
1 | try: |
- pytest.raise()
- 可以捕获特定的异常
- 获取捕获的异常的细节(异常类型、异常信息)
- 发生异常,后面的代码将不会被执行
1 | def test_raise1(): |
Pytest_L3
Pytest结合数据驱动-yaml
-
什么是数据驱动
- 数据驱动就是数据的改变从而驱动自动化测试的执行,最终引起测试结果的改变。简单来说就是参数化的应用。
-
应用
- App、Web、接口自动化测试
- 测试步骤数据驱动
- 测试数据的驱动
- 配置的数据驱动
yaml文件介绍
-
对象:键值对的集合,用冒号“:”表示
-
数组:一组按次序排列的值,前加“-”
-
纯量:单个的,不可再分的值
- 字符串
- 布尔值
- 整数
- 浮点数
- Null
- 时间
- 日期
-
读取yaml文件
- 安装:pip install pyyaml
- 方法:yaml.safe_load(f)
- 方法:yaml.safe_dump(f)
- datas/data.yaml
1 | #相当于[[1,2,3],[3,6,9],[100,200,300]] |
- func/operation.py
1 | # coding=utf-8 |
- testcase/test_add.py
1 | # coding=utf-8 |
Pytest 结合数据驱动-excel
- openpyxl
1 | def get_excel(): |
Pytest 结合数据驱动-csv
1 | # 读取csv文件 |
Pytest 结合数据驱动-json
1 | # 读取json文件 |
Pytest 测试用例生命周期管理-Fixture用法
- 命令灵活:对应setup,teardown,可以不起这两个名字
- 数据共享:在conftest.py配置里写方法,可以实现数据共享,不需要import导入
- scope的层次及申请的yield组合相当于各种setup和teardown
- 实现参数化
-
场景:
测试用例执行时,加入有10条用例,其中4条需要登录,setup和teardown无法满足 -
步骤
- 导入pytest
- 在登录的函数(要实现自动化的函数)上面加上@pytest.fixture()
- 在要使用的测试方法中传入(登录函数名称),将会执行登录的方法
- 不传入登录函数的将会直接执行测试方法
1 | import pytest |
Fixture在自动化中的应用-作用域
| 取值 | 范围 | 说明 |
|---|---|---|
| function | 函数级 | 每一个函数或方法都会调用 |
| class | 类级别 | 每个测试类只运行一次 |
| module | 模块级 | 每个.py文件调用一次 |
| package | 包级 | 每个python包只调用一次(暂不支持) |
| session | 会话级 | 每个会话只运行一次,绘画内所有方法及类,模块都共享这个方法 |
1 | import pytest |
Fixture在自动化中的应用-yield关键字
- 场景:测试方法后销毁清除数据的如何进行
- 解决:在fixture函数中加入yield关键字,yield是调用第一次返回的结果,第二次执行它下面的语句返回
- 步骤:在@pytest.fixture(scope=module),在登录的方法中加入yield,之后加销毁清除的步骤
1 | import pytest |
Pytest生命周期管理-自动注册
-
场景
与其他人一起开发,公共模块要在不同文件中,要在大家都能访问到的地方 -
解决
使用conftest.py这个文件进行数据共享,并且可以放在不同位置起到共享作用 -
前提
- conftest文件名不能换
- 放在项目下是全局共享的地方
-
执行
- 系统执行到参数login时,先从本模块中查找是否有这个名字的变量什么的
- 之后在conftest.py中找是否有
-
步骤
将登录模块@pytest.fixture写在conftest.py文件中
1 | # conftest.py |
Pytest生命周期管理-自动生效
- 场景:
不想测试方法有改动,或全部都自动实现,自动应用,没特例,也都不需要返回值时可以选择自动应用 - 解决:
使用fixture中参数 autouse=True 实现 - 步骤:
在方法上面加@pytest.fixture(autouse=True)
1 | # conftest.py |
Pytest fixture 实现参数化
- 场景:
测试离不开数据,为了数据灵活,一般数据都是通过参数传递的 - 解决:
fixture 通过固定参数request传递 - 步骤:
在fixture中增加@pytest.fixture(params=[1,2,3,‘linda’])
在方法参数中写request,方法体里面使用request.param接收参数
1 | import pytest |
Pytest_L4
Pytest 配置文件-pytest.ini
- pytest.ini是pytest的配置文件
- 可以修改pytest的默认行为
- 不能使用任何中文符号,包括汉字、空格、引号、冒号等等
- 作用
- 修改用例的命名规则
- 配置日志格式,比代码配置更方便
- 添加标签,防止运行过程报警告错误
- 指定执行目录
- 排除搜索目录
执行check_开头和 test_开头的所有的文件,后面一定要加*
python_files = check_* test_*
Pytest插件
- pytest 插件分类
- 外部插件 pip install 安装插件
- 本地插件 pytest自动模块发现机制(conftest.py)存放的
- 内置插件 代码内部的_pytest目录加载
- pytest hook介绍
- pytest hook执行顺序
Pytest 常用插件
1 | pytest --collect-only 收集测试用例 |
Pytest并行与分布式执行
1 | pip install pytest-xdist 分布式并发执行测试用例 |
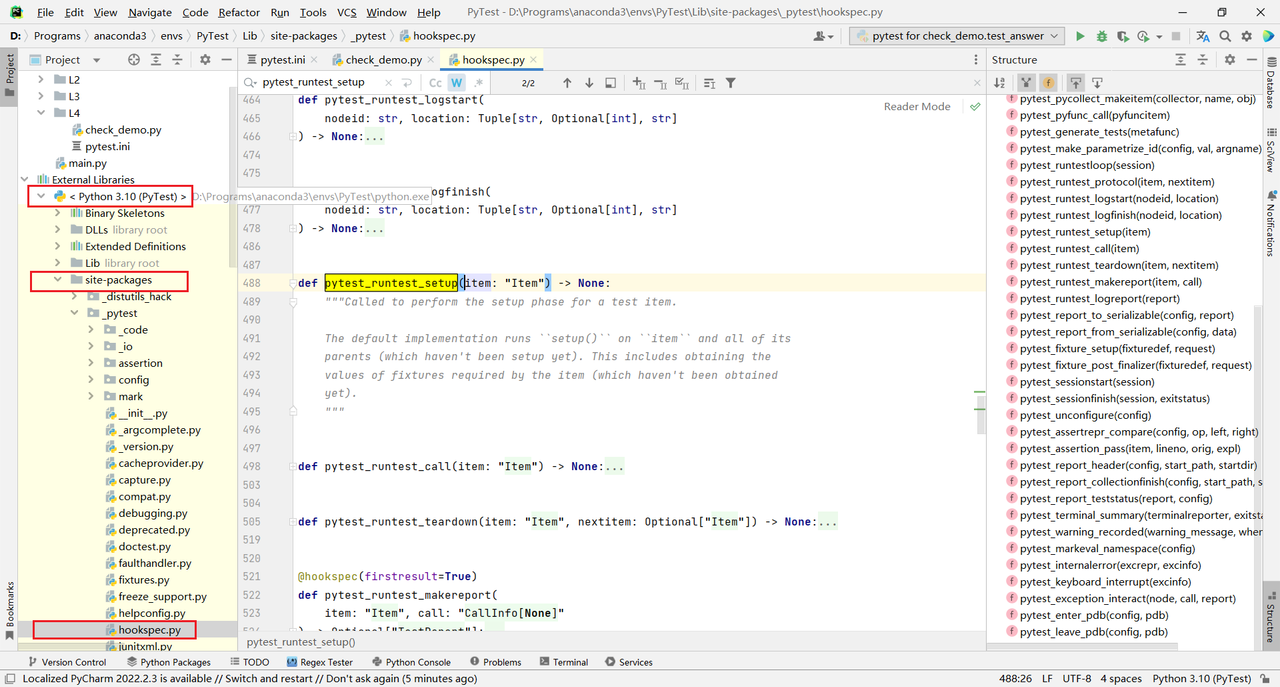
Pytest内置插件 hook 体系
- 是个函数,在系统消息触时被系统调用
- 自动触发机制
- Hook函数的名称是确定的
- pytest有非常多的勾子函数
- 使用时直接编写函数体
1 | conftest.py(存放在根目录下) |
1 | test_hook.py |
总结
- hook函数名字固定
- hook函数会被自动执行
- 执行是有先后顺序的
- pytest定义了很多hook函数,可以在不同阶段实现不同功能
Pytest插件开发
pytest_collection_modifyitems 收集上来的测试用例
Allure2_L1
Allure2安装
- Java开发、轻量级、灵活的测试报告工具
- 多平台的Report框架
- 支持多语言,Python、JavaScript、PHP、Ruby
- 可以为开发/测试/管理等人员提供详尽的测试报告,包括测试类别、测试步骤、日志、图片、视频等
- 可为管理层提供高水准的统计报告
- 可以集成到Jenkins生成在线的趋势汇总报告
1 | # Ubuntu 2204 |
运行方式
- 运行用例,添加 --alluredir
1 | pytest [测试用例/模块/包] --alluredir=存放结果路径 |
- 生成报告
- allure server 生成在线报告
- allure generate 生成静态资源报告
1 | # 指定端口、IP |
Allure2_L2
allure2 报告生成
常用参数
- allure generate可以输出路径,也可以清理上次的报告记录
- -o / --output 输出报告的路径
- -c / --clean 如果报告路径重复
- allure open打开报告
- -h / --host 主机IP地址,此主机将用于启动报表的web服务
- -p / --port 主机端口,此端口将用于启动报表的web服务器,默认值0
清理上次结果 --clean-alluredir
1 | root@3832dba7df75:~/code/vscode-server/PyTest/Allure2_L1/allure2_2# pytest test_allure_demo.py --alluredir=./results --clean-alluredir |
allure generate 生成静态资源报告
1 | root@3832dba7df75:~/code/vscode-server/PyTest/Allure2_L1/allure2_2# allure generate ./results |
allure generate 生成静态资源报告,指定输出报告路径
1 | root@3832dba7df75:~/code/vscode-server/PyTest/Allure2_L1/allure2_2# allure generate ./results -o ./myreports |
allure open打开报告,指定IP,port
1 | root@3832dba7df75:~/code/vscode-server/PyTest/Allure2_L1/allure2_2# allure open -h 172.17.0.3 -p 20000 ./allure-report/ |
allure2 报告中添加常用用例
allure用法
| 方法名 | 方法参数 | 参数说明 |
|---|---|---|
| @allure.epic() | epic描述 | 敏捷里面的概念,定义史诗,往下是feature |
| @allure.feature() | 模块名称 | 功能点的描述,往下是story |
| @allure.story | 用户故事 | 用户故事,往下是title |
| @allure.title(用例的标题) | 用例的标题 | 重命名html报告名称 |
| @allure.step() | 操作步骤 | 测试用例的步骤 |
| @allure.testcase() | 测试用例的连接地址 | 对应功能测试用例系统里面的case |
| @allure.issue() | 缺陷 | 对应缺陷管理系统里面的链接 |
| @allure.description | 用例描述 | 测试用例的描述 |
| @allure.severity() | 用例等级 | blocker,citical,normal,minor,trival |
| @allure.link() | 链接 | 定义一个链接,在测试报告展现 |
| @allure.attachment() | 附件 | 报告添加附件 |
- 通过使用装饰器@allure.title可以为测试用例自定义一个可阅读性的标题
- allure.title的三种使用方法
- 直接使用@allure.title为测试用例自定义标题
1 |
|
- @allure.title 支持通过占位符的方式传递参数,可以实现测试用例标题参数化,动态生成测试用例标题
1 |
|
- allure.dynamic.title 动态更新测试用例标题
1 |
|
allure2 报告中添加用例步骤
Allure支持两种方法:
- 使用装饰器定义一个测试步骤,在测试用例中使用
1 |
|
- 使用with allure.step() 添加测试步骤
1 |
|
allure2 报告中添加用例链接
- @allure.link(url,name)添加一个普通的link链接
1 | # 1. 添加一个普通的 link 链接 |
- @allure.testcase(url,name) 添加一个用例管理系统连接
1 | # 3. 添加用例管理系统链接 |
- @allure.issue(url,name) 添加bug管理系统连接
1 | # 4. 添加 bug管理系统链接 |
allure2 报告中添加用例分类
- @allure.epic:敏捷里面的概念,定义史诗(相当于需求),往下是feature
1 | pytest test_allure_feature.py --alluredir=./results --allure-epics=demand1 |
- @allure.feature:功能点的描述,理解成模块,往下是story
1 | pytest test_allure_feature.py --alluredir=./results --allure-features=demand1_function2 |
- @allure.story:故事story是feature的子集
1 | pytest test_allure_feature.py --alluredir=./results --allure-stories=demand1_function2_sub_function3 |
- 需求1+需求2-功能模块1-子功能模块3
1 | pytest test_allure_feature.py --alluredir=./results --allure-epics=demand1 --allure-stories=demand2_function1_sub_function3 |
报告中添加用例描述
- 使用装饰器 @allure.description()传递一个字符
1 |
|
- 使用装饰器 @allure.description_html传递一段HTML文本来描述测试用例
1 |
|
- 直接在测试用例方法中通过编写文档注释的方法来添加描述
1 | def test_description_dostring(): |
- 用例代码内部动态添加描述信息
1 |
|
allure2报告中添加用例优先级
- 应用场景,用例执行时,希望按照严重级别执行测试用例
- 解决:为每个用例添加一个等级的装饰器 @allure.severity
- 类上添加的级别,对类中没有添加级别的方法生效
- allure对严重级别定义分为5个
- Blocker级别:中断缺陷(客户端程序无响应,无法执行下一步操作)
- Critical级别:临界缺陷(功能点缺失)
- Normal级别:普通缺陷(数值计算错误)
- Minor级别:次要缺陷(界面错误与UI需求不符)
- Trivial级别:轻微缺陷(必输项无提示,或提示不规范)
- 运行时添加命令行参数 --allure-serverities
1 | import allure |
allure2报告中添加用例支持tag标签
1 | import pytest |
allure2 报告中支持记录失败重试功能
- 重试功能可以使用pytest相关插件 pytest-rerunfailures
1 | # pip install pytest-rerunfailures |
Allure2_L3
Allure2 报告中添加附件-图片
- allure.attach.file(source,name,attachment_type,extension)
- source:文件路径
- name:附件名字
- attachment_type:附件类型,是allure.attachment_type其中的一种
- extension:附件的扩展名
1 | import allure |
- allure.attach(body,name=None,attachment_type=None,extension=None)
- body:要写入附件的内容
- name:附件名字
- attachment_type:附件类型,是allure.attachment_type其中的一种
- extension:附件的扩展名
1 | def test_pic1(self): |
Allure2 报告中添加附件-日志
- 配置工具类
1 | # 创建一个日志模块 log_util.py |
1 | import sys |
- 禁用日志
–allure-no-capture
Allure2 报告中添加附件-html
- 语法:allure.attach(body,name=None,attachment_type=None,extension=None)
- body:要写入附件的内容
- name:附件名字
- attachment_type:附件类型,是allure.attachment_type其中的一种
- extension:附件的扩展名
1 | import allure |
Allure2_L4
allure2报告定制
- 定制页面logo
- 获取安装路径
1 | root@3832dba7df75:~/code/vscode-server# ll /root/downloads/allure |
- 修改config下的allure.yml文件
1 | plugins: |
- allure.yml修改后,在plugins下custom-logo-plugin内的static文件夹下修改style.css文件中的url,替换需要的文件
1 | .side-nav__brand { |
- 修改标题内容
- 修改style.css文件
1 | /* 去掉logo后面的Allure文本 */ |
- 标题: PyTestAllure
- 作者: Sunmy
- 创建于 : 2023-09-12 14:31:27
- 更新于 : 2025-06-29 21:05:24
- 链接: https://ldspdvsun.github.io/cmchvp8gb0049h0gb097ig7og/
- 版权声明: 版权所有 © Sunmy,禁止转载。